Some families kick off Christmas by decorating the tree or watching the first holiday movie.
In our home, the holiday season begins with a pot full of apples, brown sugar, spices, and a spoonful of rich molasses — the start of our annual Instant Pot Apple Butter Day.
This tradition is one of my favorites because it slows us down and makes us feel connected. The house fills with that warm, cozy smell, and everyone knows: Christmas is coming.
This year we hosted twenty family and friends for Thanksgiving. My wife Jess baked mini sourdough loaves (she is the true MVP), and together we gifted each family a loaf and a jar of our instant pot apple butter to take home. It made the gathering feel so intentional and special — not just a meal, but a memory.
We also continued one of our favorite gratitude games: we place handwritten questions inside some of the dinner rolls and everyone takes a turn answering theirs. Lots of laughter, some sweet emotions, and stories we’ll carry into the next year.
If you want to create more fun, meaningful traditions too, check out my post: 25+ Meaningful Holiday Traditions & Hosting Ideas
But first — let’s make this apple butter together.
What Makes This Version the Best?
I’ve tested apple butter countless ways — stovetop, slow cooker, oven, you name it.
Nothing beats this Instant Pot version because:
- No stirring or babysitting
- Deep caramelization thanks to molasses added from the beginning
- Perfectly smooth texture every time
- My signature Venting Pressure Thickening Method
- Freezer-friendly for gifting later
- Easy enough for kids to help
This is the recipe we’ll be making for years to come.
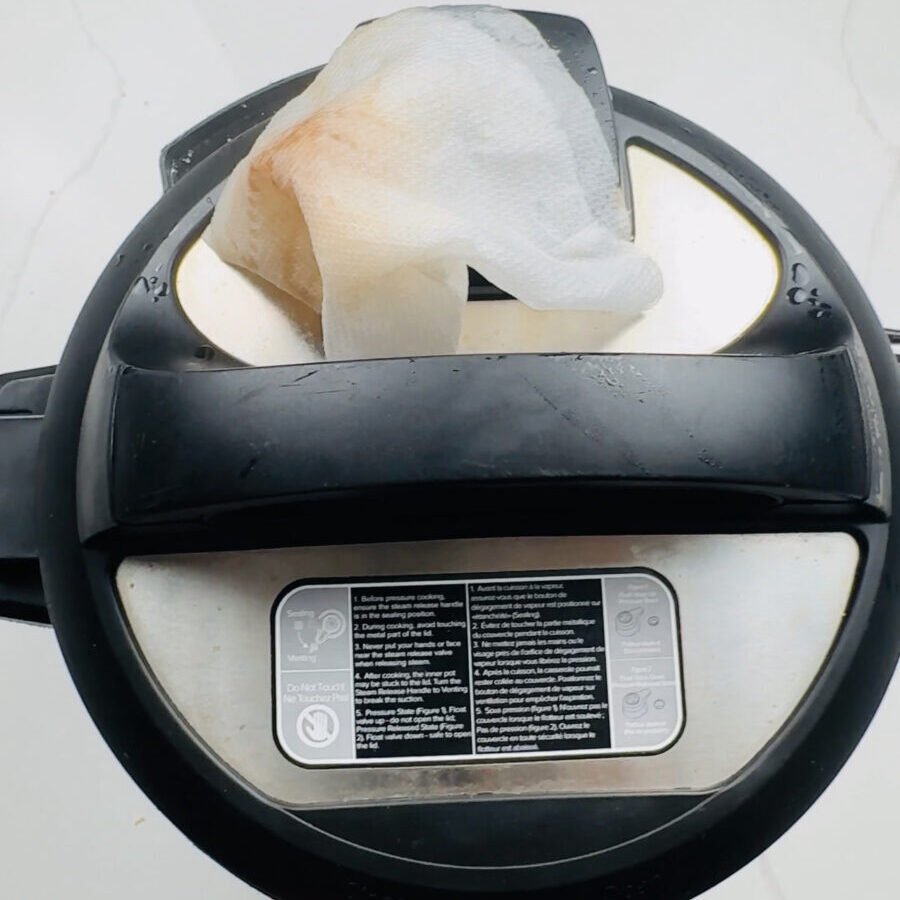
The Venting Pressure Trick (Total Game-Changer)
Most recipes have you simmer the apple butter uncovered for an hour or more. The problem?
It can scorch. It can splatter. And it takes forever.
Instead, we:
- Blend apples after pressure cooking
- Lock lid again
- Turn Pressure Cook ON
- Keep the vent OPEN
What this does:
- Rapidly evaporates excess liquid
- Deepens caramel flavor fast
- Keeps mess inside the pot
- No elbow-aching stirring required
You’ll get that dark, glossy apple butter that mounds perfectly on a spoon.
➡️ Join The Colorful Pantry email list and make this season the most joyful one yet!
Ingredients & Substitutions
A great apple butter starts with great apples.
I recommend a mix for balanced sweetness and tartness:
- Honeycrisp
- Fuji
- Gala
- Pink Lady
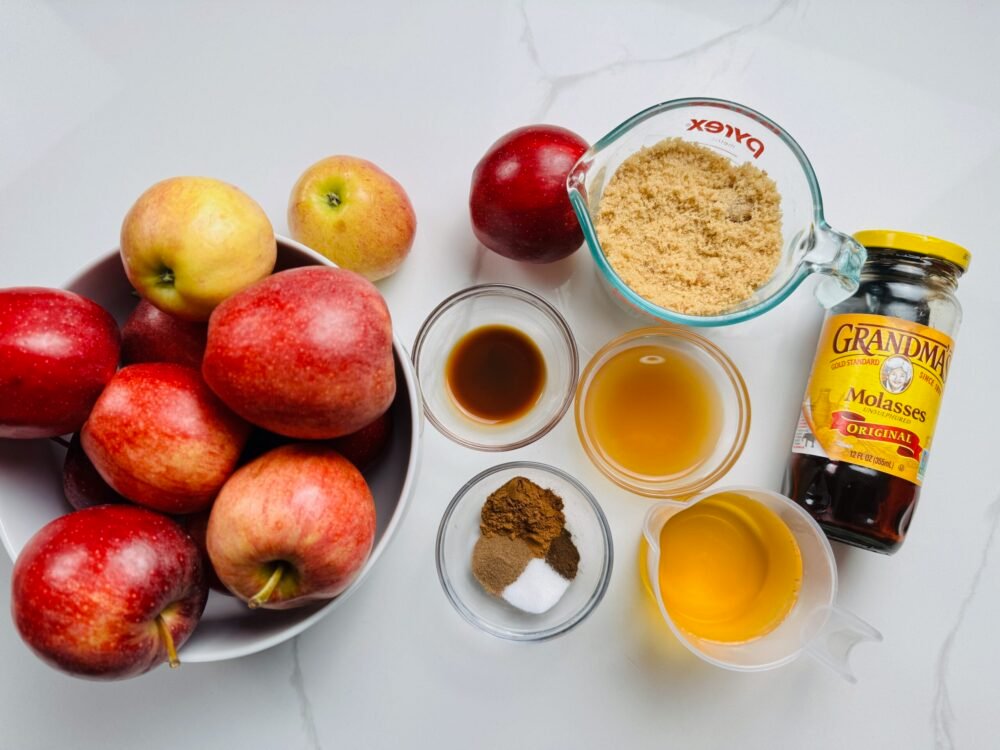
Avoid Red Delicious — they’re too soft and watery.
Brown sugar provides rich flavor, and molasses added up front transforms the color and depth — especially for Christmas time.
Warm spices bring the cozy vibes: cinnamon, cloves, nutmeg, allspice.
Add a pinch of cardamom or ginger if you want an aromatic twist.
A splash of apple cider vinegar brightens and balances everything.
Step-by-Step: How to Make Instant Pot Apple Butter
Step 1 — Load the pot
Add peeled and chopped apples, brown sugar, cinnamon, cloves, nutmeg, allspice, salt, apple juice, apple cider vinegar, and molasses right into the Instant Pot. Stir.
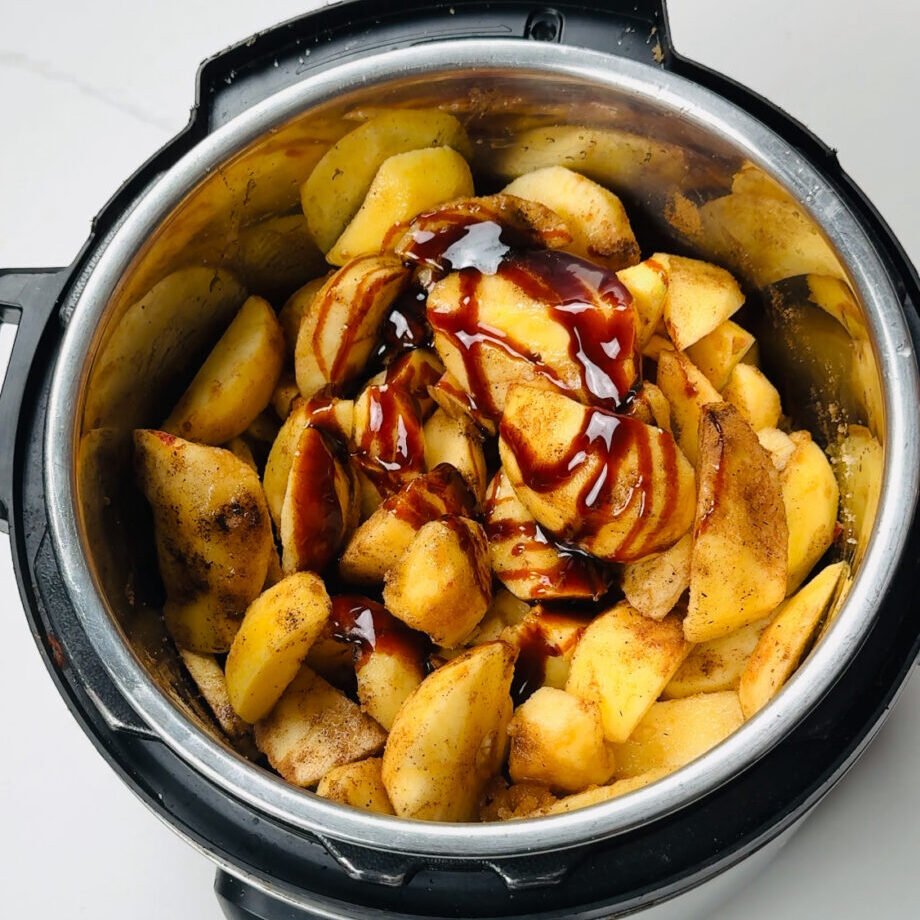
Step 2 — Pressure cook
Lock lid and Pressure Cook High for 60 minutes.
Allow a 10-minute natural release, then quick release.
Step 3 — Blend smooth
Use an immersion blender (affiliate link) until the mixture is velvety smooth.
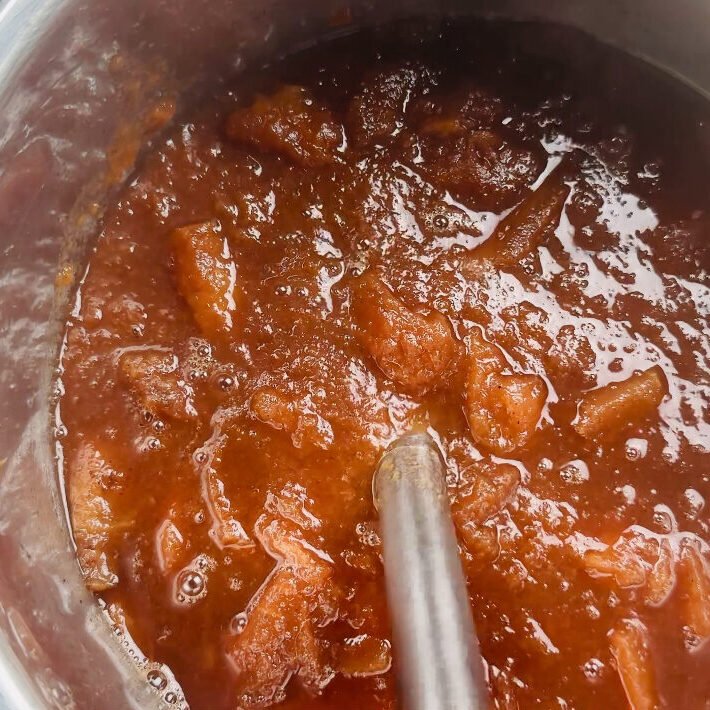
Step 4 — Thicken faster
Close and lock lid again, keep vent OPEN, and turn Pressure Cook ON for 10–15 minutes.
This evaporates moisture quickly for a darker, thicker butter.
Step 5 — Finish + jar
Stir in vanilla extract.
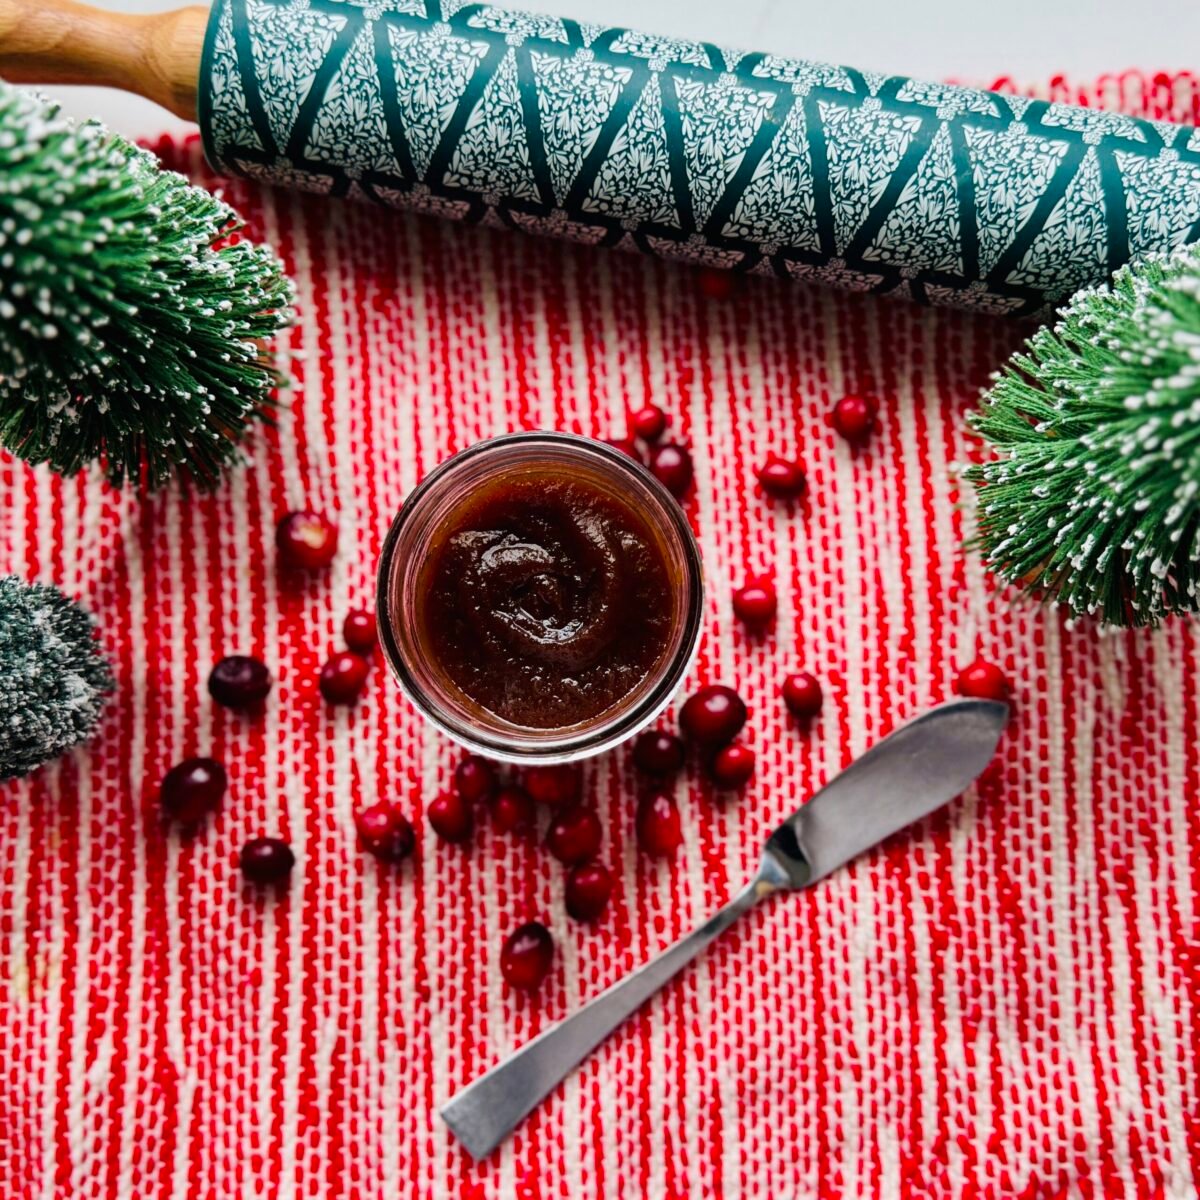
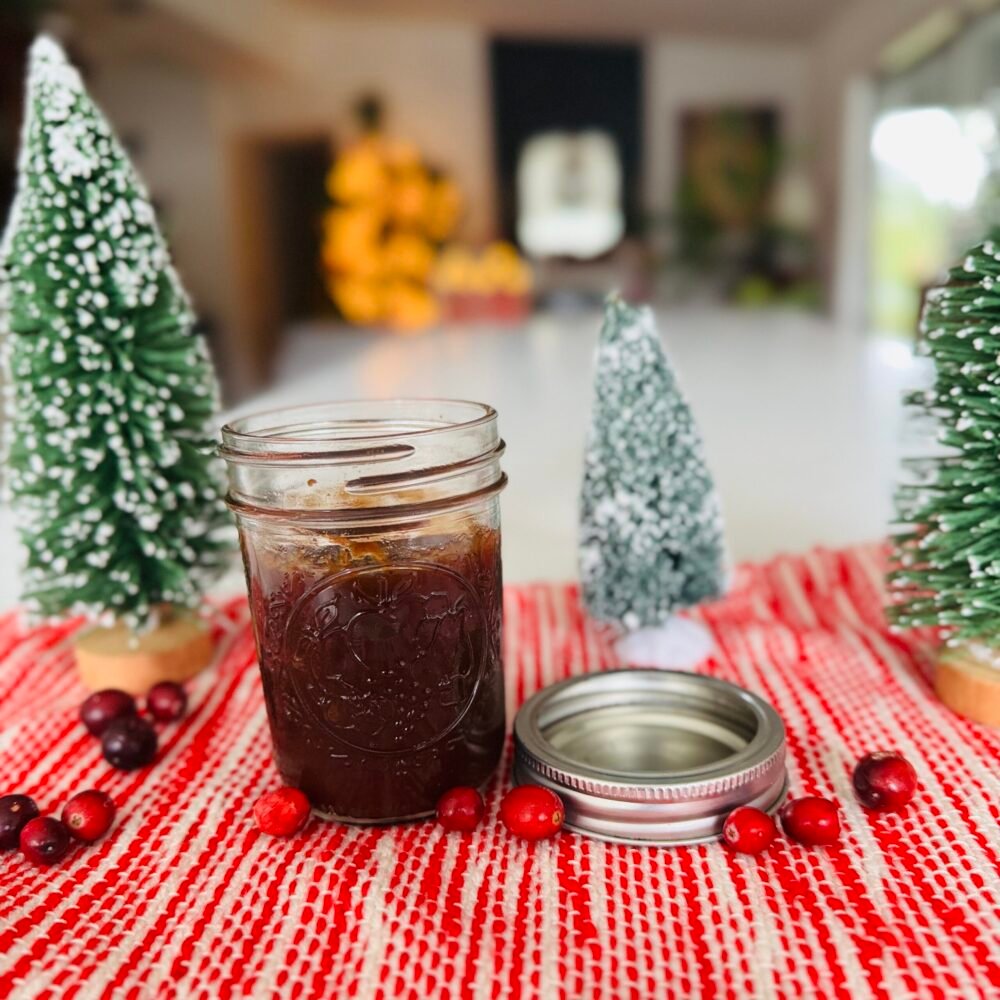
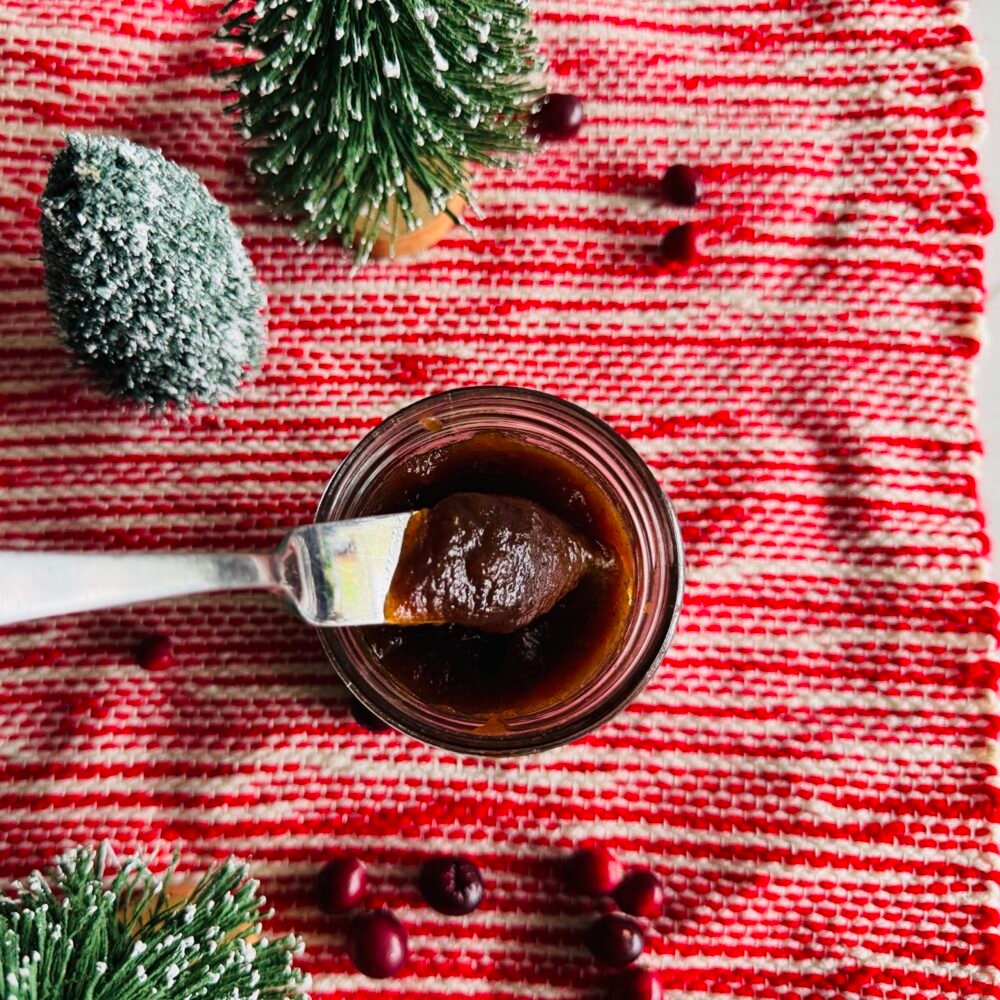
Cool completely → transfer to jars → enjoy and share!
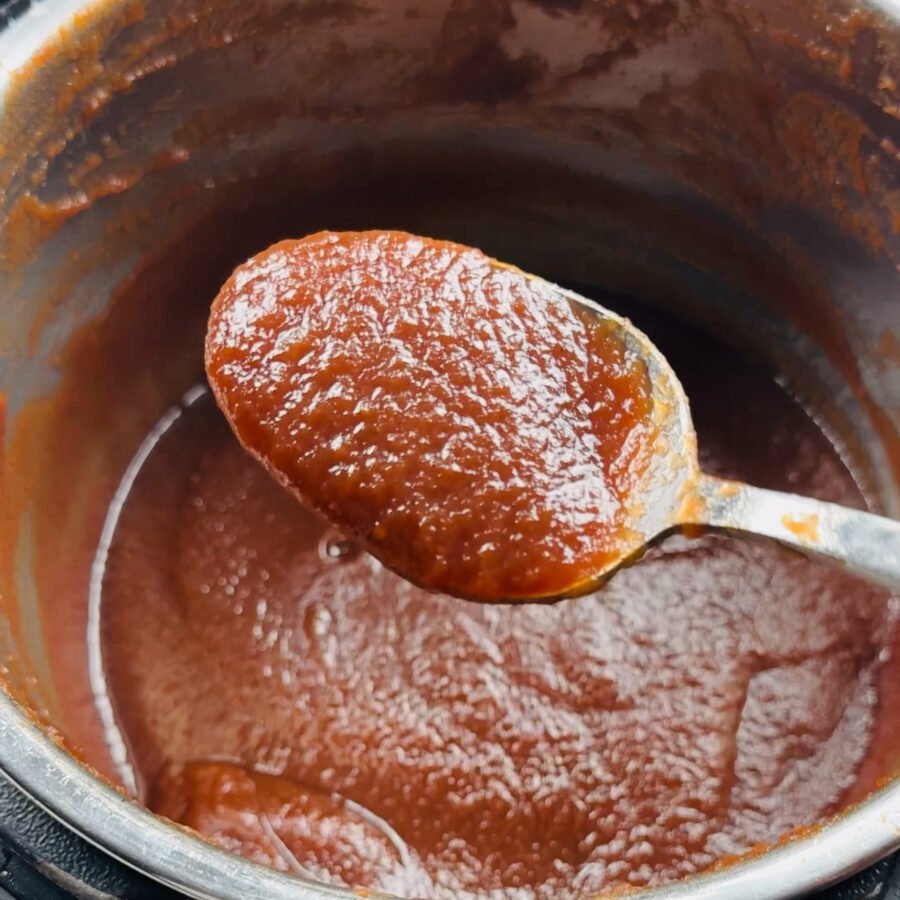
Pro Tip: If the texture is still looser than you want, repeat Step 4 for an additional 5 minutes.
Ways to Use Instant Pot Apple Butter
- Spread on sourdough or biscuits
- Swirl into oatmeal or yogurt
- Drizzle over pancakes or waffles
- Amazing on pork chops
- Add a spoonful to grilled cheese (trust me!)
- Holiday cheese boards or charcuterie
Little jar — big joy.
Make-Ahead + Storage
Fridge: up to 2 weeks
Freezer: up to 6 months
Canning: possible — follow USDA-approved methods
This recipe is perfect for holiday gifting. Pair with a ribbon and handwritten note, or a mini spatula, and everyone will want seconds.
More Recipes to Try
Christmas Cranberry Mocktail with Pickled Cranberries
Cranberry Sauce with Orange & Cinnamon
Essential Pantry Staples for a Stress-Free Christmas
Frequently Asked Questions
Do I need to peel the apples?
No — the peel adds color and nutrients. I peel for silky texture (kid-approved).
Can I double the recipe?
As long as you don’t exceed the maximum fill line of your Instant Pot.
Is molasses required?
No — but it gives unmatched caramel depth and holiday flavor.
Can I reduce or add the sugar?
Yes — taste after blending and adjust to your preference.
A Tradition Worth Keeping
Every jar we give represents a moment, a meal, and a memory shared.
It’s our way of saying, “We’re thankful for you.”
Food is more than fuel — it’s connection.
This instant pot apple butter is proof of that.
If you make this recipe, tag me @thecolorfulpantry so I can see your holiday traditions in action. I love celebrating these cozy kitchen wins with you.
Affiliate Disclosure: Some of the links in this post may be affiliate links. That means I may earn a small commission if you buy through them — at no extra cost to you. Thank you for supporting The Colorful Pantry and helping us bring more recipes and resources your way!

Instant Pot Apple Butter (No-Stir + Freezer Friendly)
Equipment
- Instant Pot (6 or 8 qt)
- Measuring cups & spoons
- Glass jars with lids
Ingredients
- Apple Butter
- 6 –7 lbs apples about 12–14 medium — Honeycrisp, Fuji, or mixed
- ½ cup apple juice
- 1 –2 tablespoon apple cider vinegar
- 1 cup packed brown sugar light or dark
- 1 teaspoon cinnamon
- ½ teaspoon ground cloves
- ½ teaspoon nutmeg
- ½ teaspoon allspice
- ½ teaspoon fine salt
Instructions
- Peel, core, and chop apples into large chunks. Add to Instant Pot.
- Add apple juice, apple cider vinegar, brown sugar, cinnamon, cloves, nutmeg, allspice, and salt. Stir well.
- Lock lid. Pressure Cook High for 60 minutes. Natural release 10 minutes, then quick release.
- Blend with immersion blender until completely smooth.
- Signature Thickening Technique: Close lid again, lock, KEEP VENT OPEN, and set Pressure Cook to ON for 10–15 minutes. This rapidly evaporates moisture and speeds caramelization.
- Remove lid. Stir in vanilla and optional molasses.
- Cool completely and transfer to jars. Refrigerate up to 2 weeks or freeze up to 6 months.
Notes
Flavor swaps: Try maple syrup, cardamom, ginger, or a splash of bourbon
Texture check: It should mound softly on a spoon
Make-ahead friendly → perfect for gifting
Kid-approved with toast, oatmeal, yogurt, ice cream


Rufus Dewanou says
The Colorful Pantry