Crispy buttery potatoes with creamy centers and a simple thin cut trick that makes them even better
I first heard of melting potatoes within the past year or so, and I truly cannot believe I had not discovered them earlier. They are absolutely a game changer and one of the best ways to eat potatoes. You get the crust you want on the outside, then that unbelievably rich texture that happens when the potatoes soak up buttery broth in the oven. If you have not tried making melting potatoes yet, you really must.
And I have to tell you, I found a way to make them even better!!
Most recipes cut the potatoes about 1 inch thick. I prefer cutting them a little thinner, closer to ¾ inch. That one small change gives you a better treat. Because the potatoes are less thick, the flavor feels more concentrated, the crust develops more evenly, and every bite gets more of that rich broth and butter. It is a simple adjustment, but it makes a big difference.
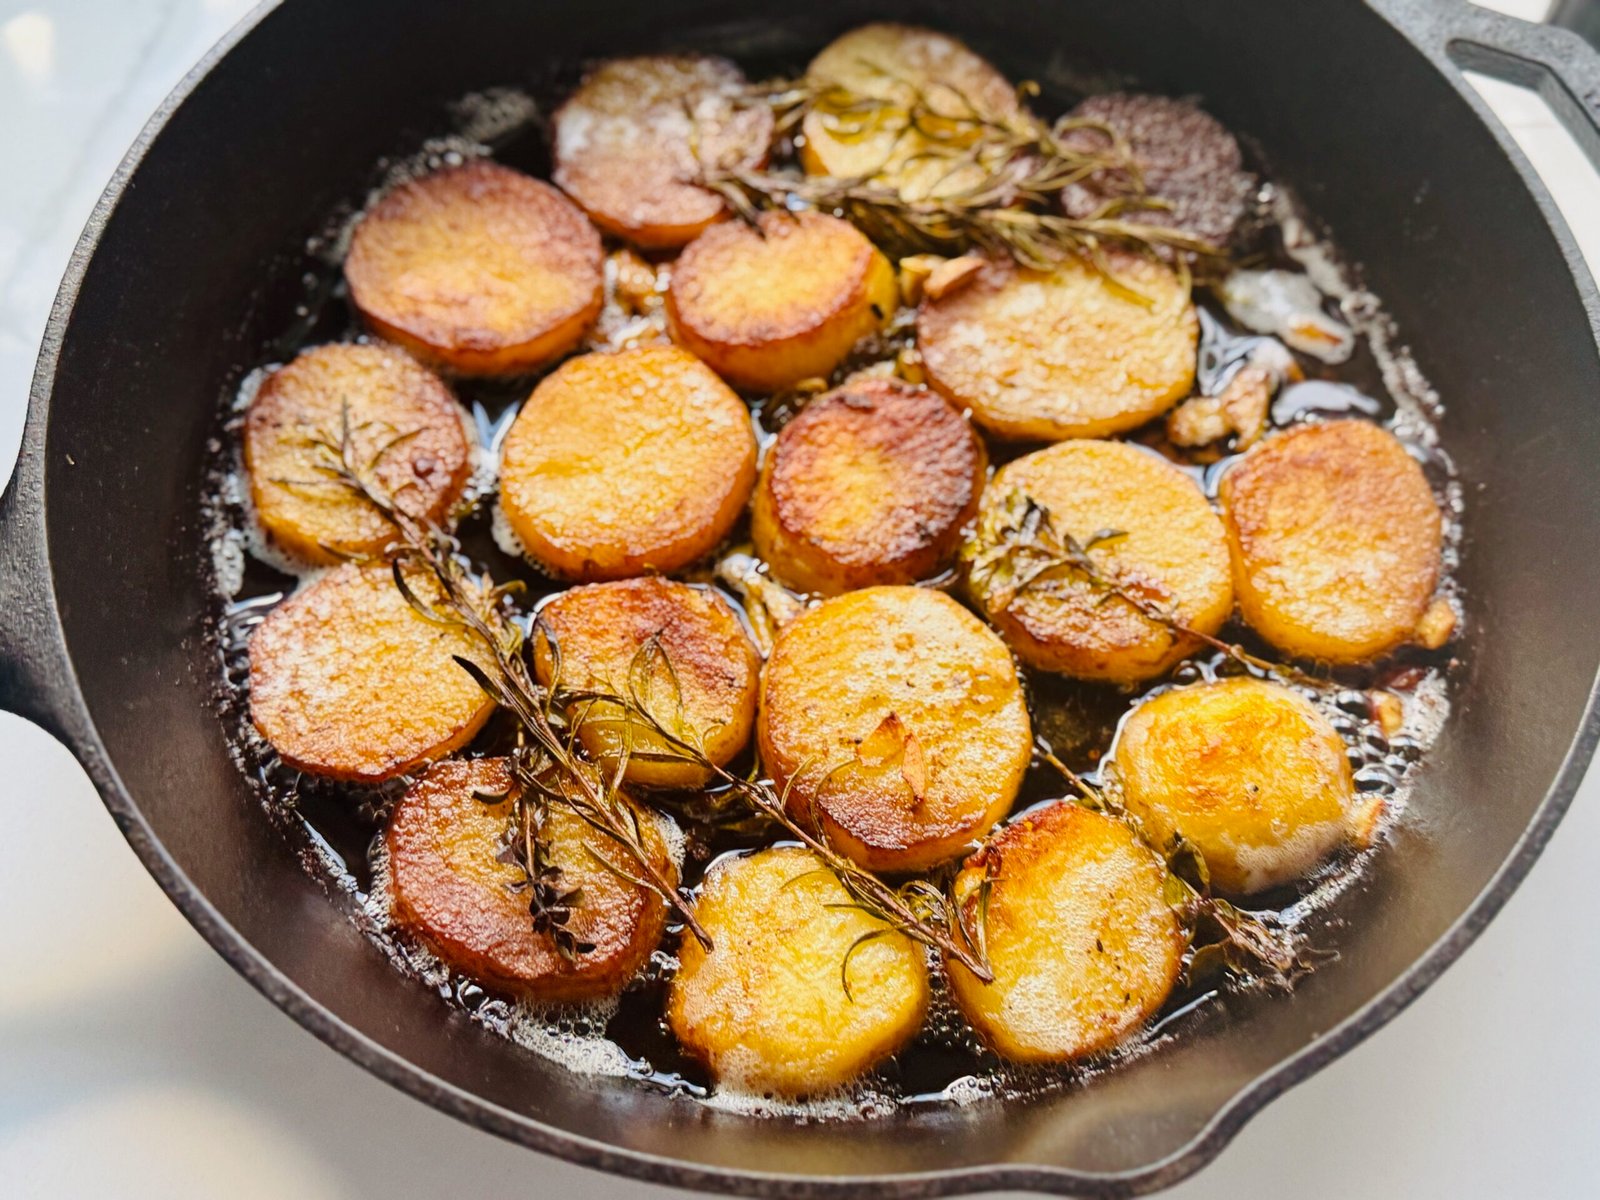
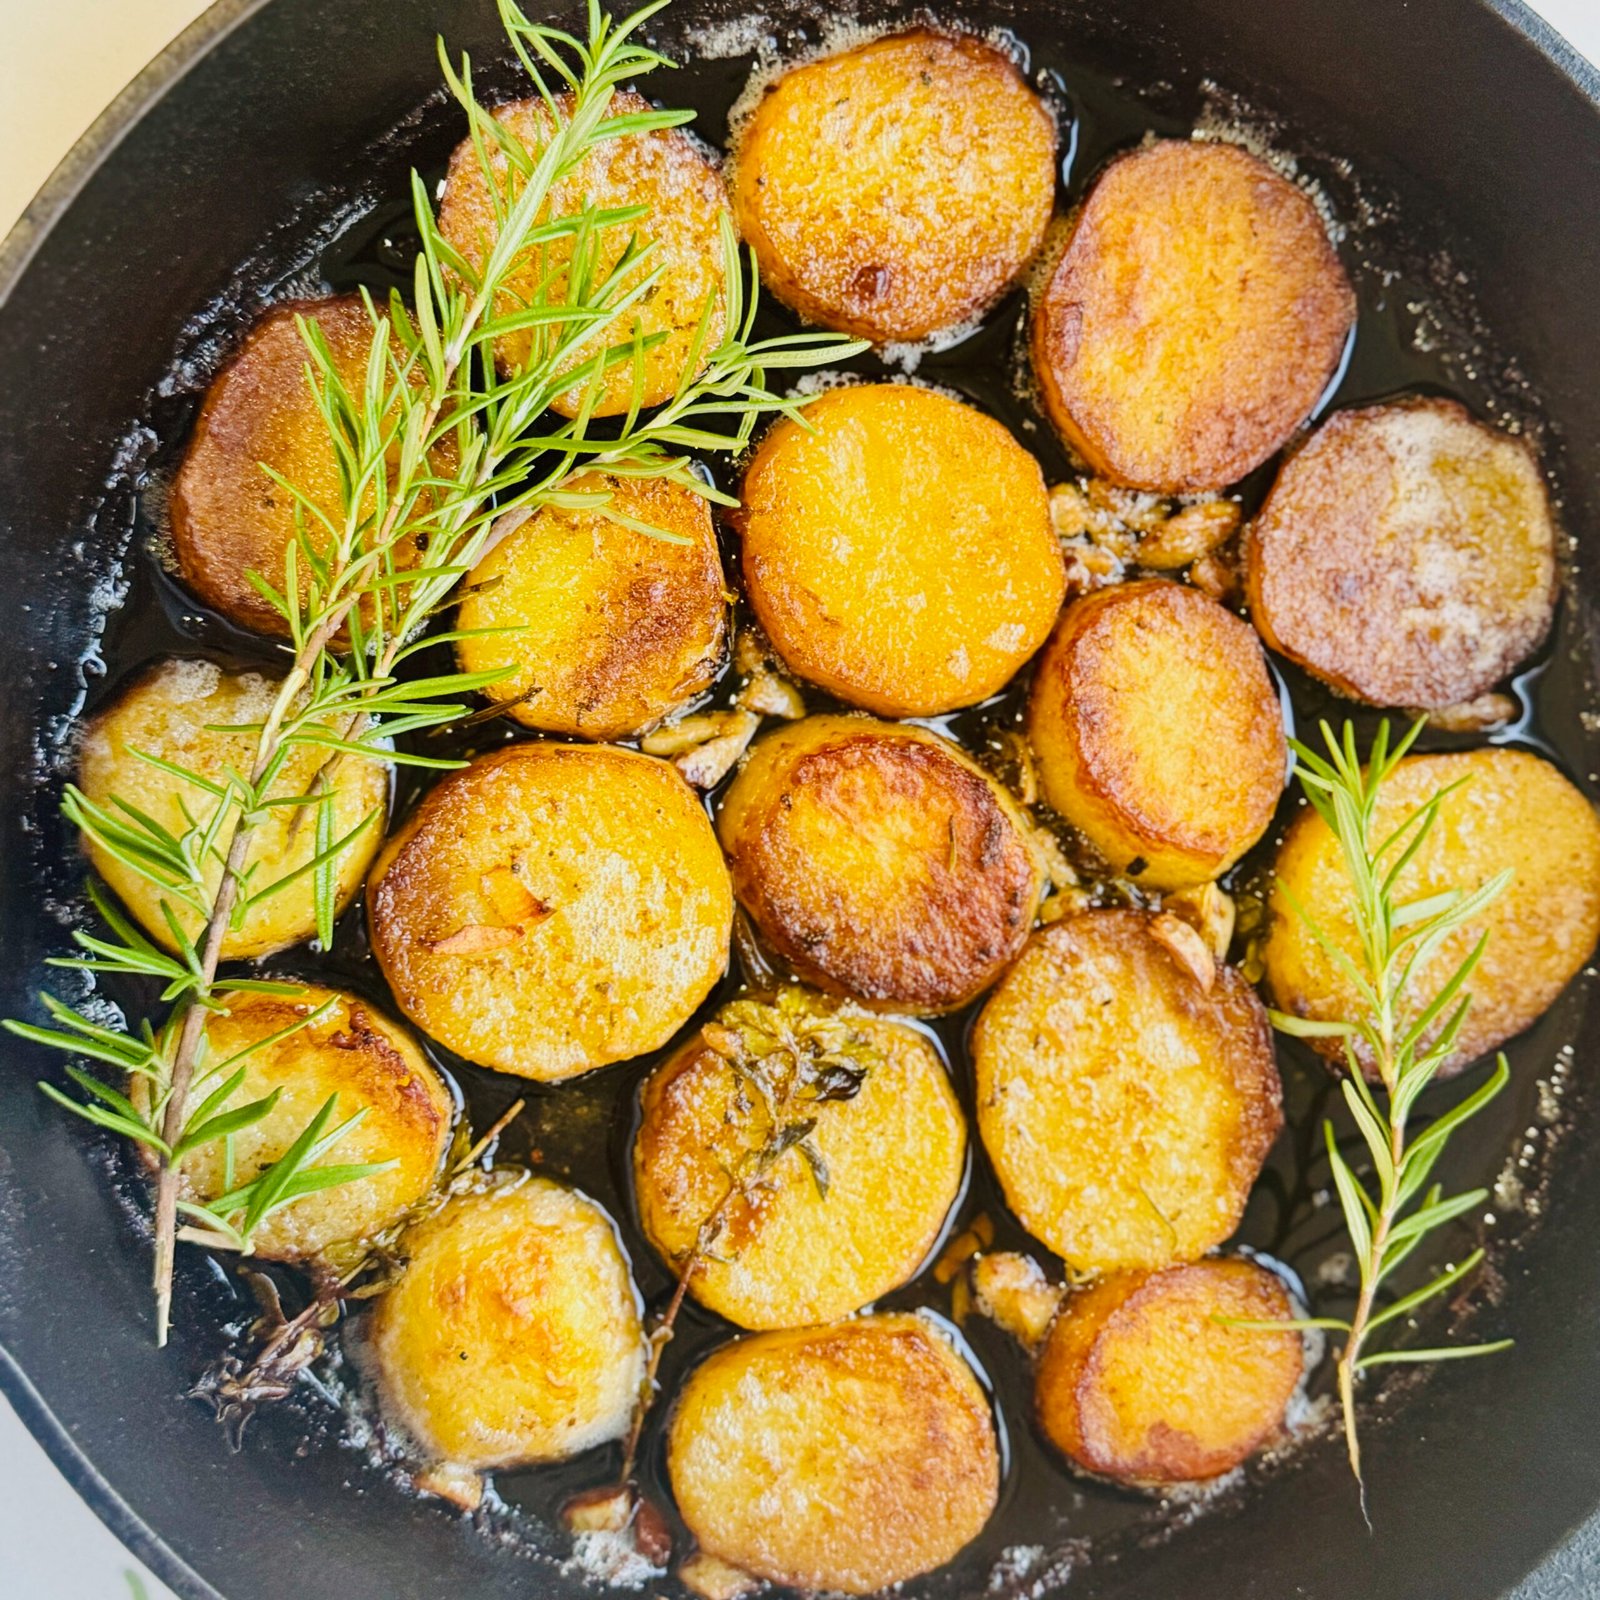
These thin cut melting potatoes are crisp on the outside, creamy in the middle, and packed with garlic, rosemary, oregano, butter, and broth. They are elegant enough for a holiday table but easy enough to make for a really good weekend dinner.
What these melting potatoes taste like and why you will love them
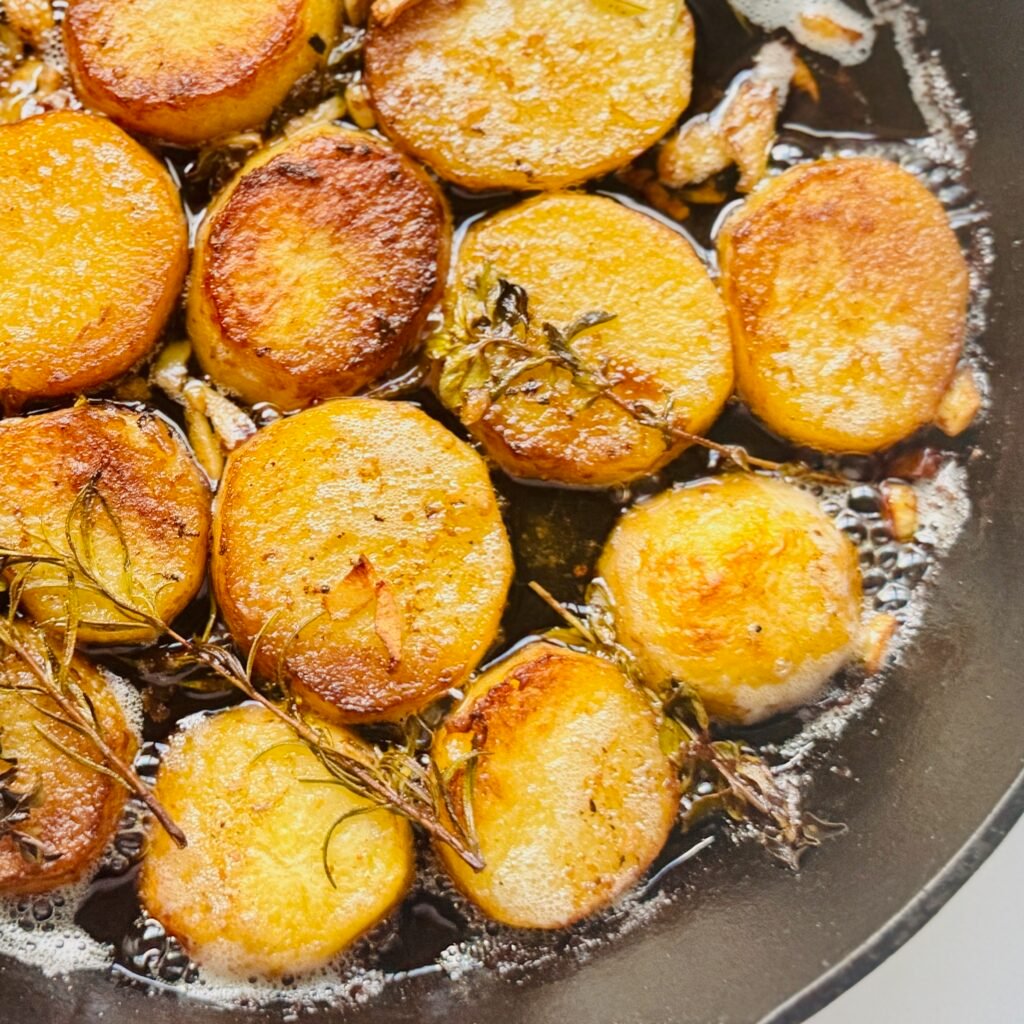
These potatoes are all about contrast. The bottoms and edges become deeply golden and crisp while the centers stay soft and tender. Then the broth reduces with the butter and herbs and turns into a glossy, savory coating that clings to every slice.
That is what makes melting potatoes so special. They give you both texture and flavor. You get crust, creaminess, butter, herbs, and garlic in the same bite.
I especially love these as a side for a holiday style dinner. They would be incredible next to my Beef Wellington recipe because they bring that same rich, impressive feel while still being comfort food at heart.
Why the thin cut method makes these potatoes better
Traditional melting potatoes are often cut thicker, and that definitely works. But after making them several times, I found that slicing them slightly thinner gave me a result I liked even more.
When the potatoes are cut around ¾ inch thick, a few really good things happen.
First, you get more surface area for browning. More browning means more flavor.
Second, the broth and butter have more chance to move into the potato, which makes each bite taste richer and more seasoned.
Third, the ratio of crust to creamy center becomes even better. You still get that soft middle, but now there is more golden edge in every serving.
That is why I keep coming back to this method. It feels like the best balance of texture and flavor.
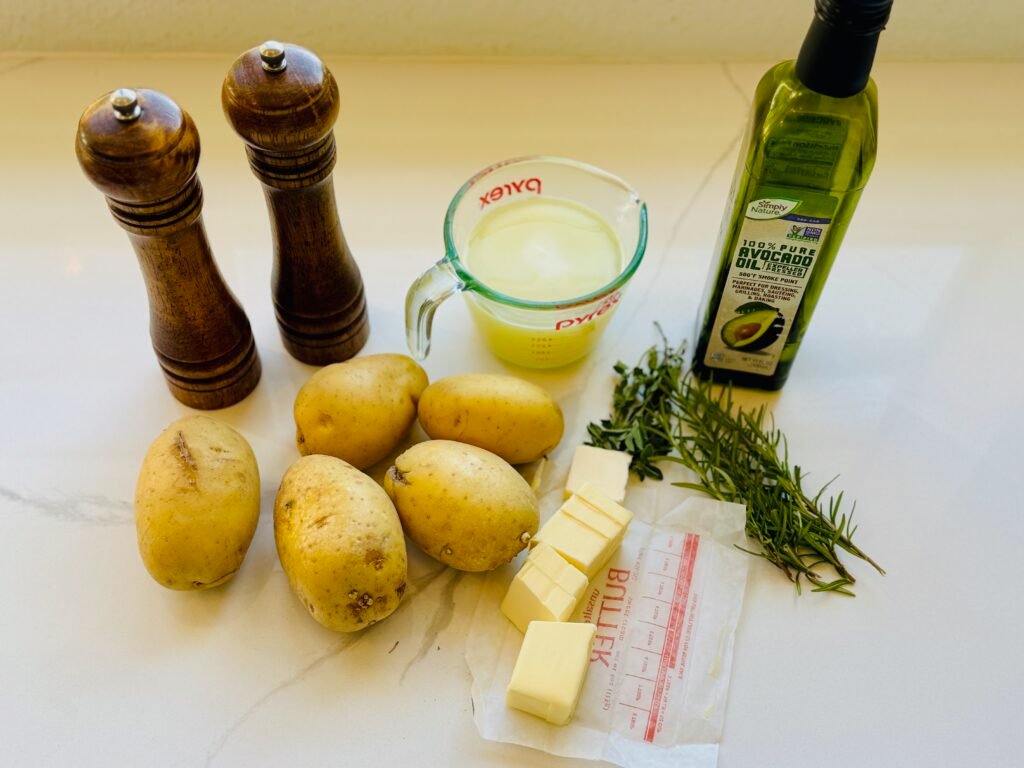
Key ingredients for the best melting potatoes
Yukon gold potatoes
Yukon gold potatoes are the best choice here because they hold their shape while turning beautifully creamy inside. They also have a naturally buttery flavor that works perfectly with the broth and herbs.
Butter and olive oil
The olive oil helps the potatoes brown well in the skillet. The butter adds richness and helps create the signature melting potato flavor. I like using a good quality extra virgin olive oil for this, such as Atlas Olive Oil , because it gives the potatoes a clean rich base.
Garlic
Smashed garlic flavors the butter and broth without overpowering the potatoes. As it cooks, it turns mellow and savory.
Rosemary and oregano
Rosemary gives the potatoes a woodsy fragrant note, while oregano adds warmth and a little earthiness. This combination feels just a bit different from the classic thyme version and works beautifully with roasted meats.
Broth
This is where the magic happens. Once the potatoes are browned, the broth goes into the pan and the oven takes over. The broth reduces, the potatoes absorb it, and the whole dish becomes richer and more layered.
A flavorful broth like Kitchen Basics Chicken Broth is a great option if you want to build even more savory depth.
How to make thin cut melting potatoes
These are easy to make, but the method matters. You start on the stovetop so the potatoes can develop a deep crust. Then you finish them in the oven with broth so they turn tender and flavorful all the way through.
Here is the basic flow.
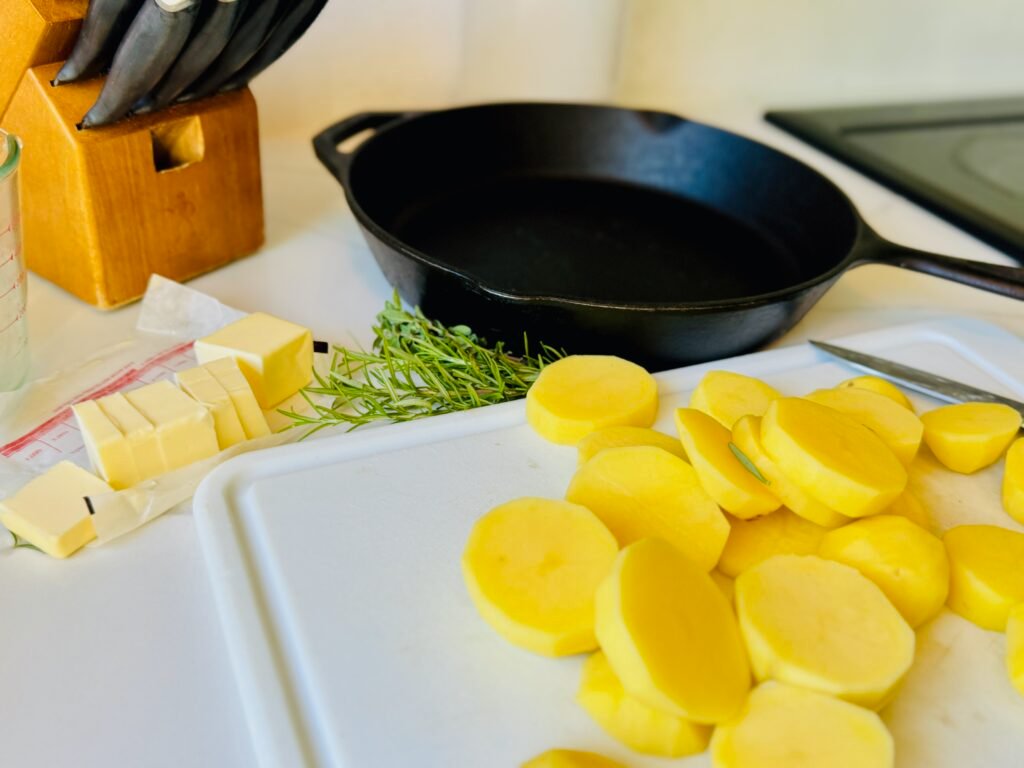
- Peel and slice the potatoes into rounds about ¾ inch thick
- Toss them with olive oil, salt, and pepper
- Brown them well on both sides in butter
- Add garlic, rosemary, and oregano
- Pour in the broth and roast until tender
- Spoon the buttery pan juices over the top and serve
For even slices, a sharp chef knife like the Victorinox Fibrox Chef Knife really helps. If your pieces vary too much in thickness, some will brown faster than others.
Step by step overview
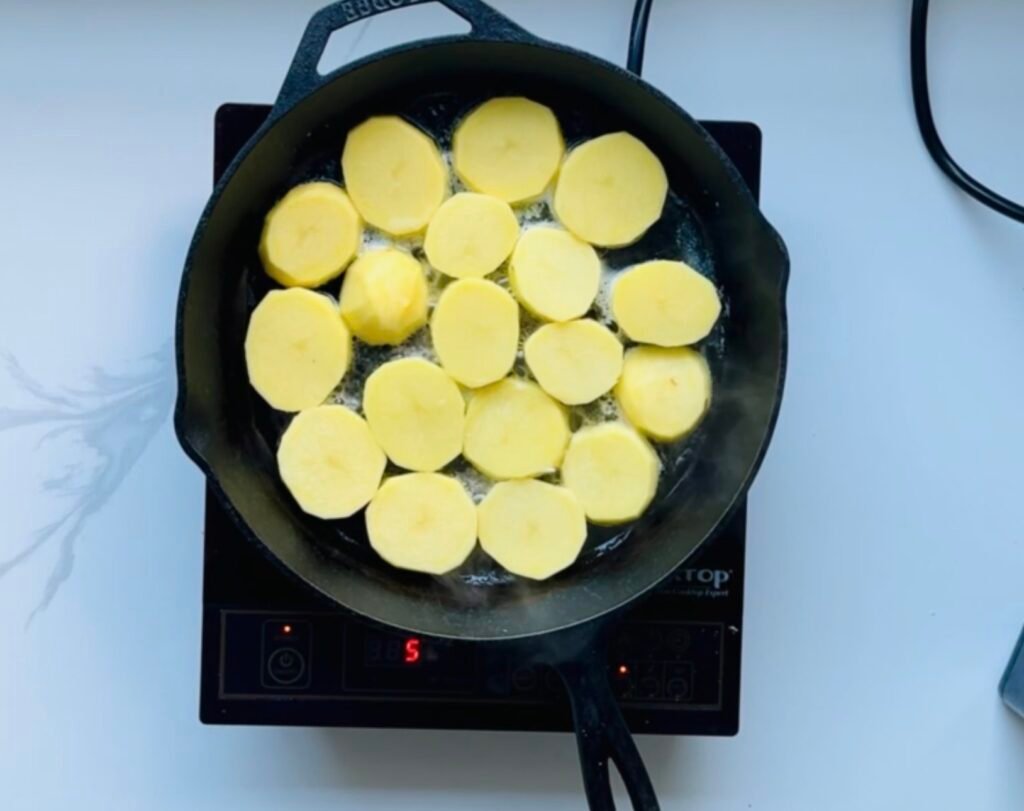
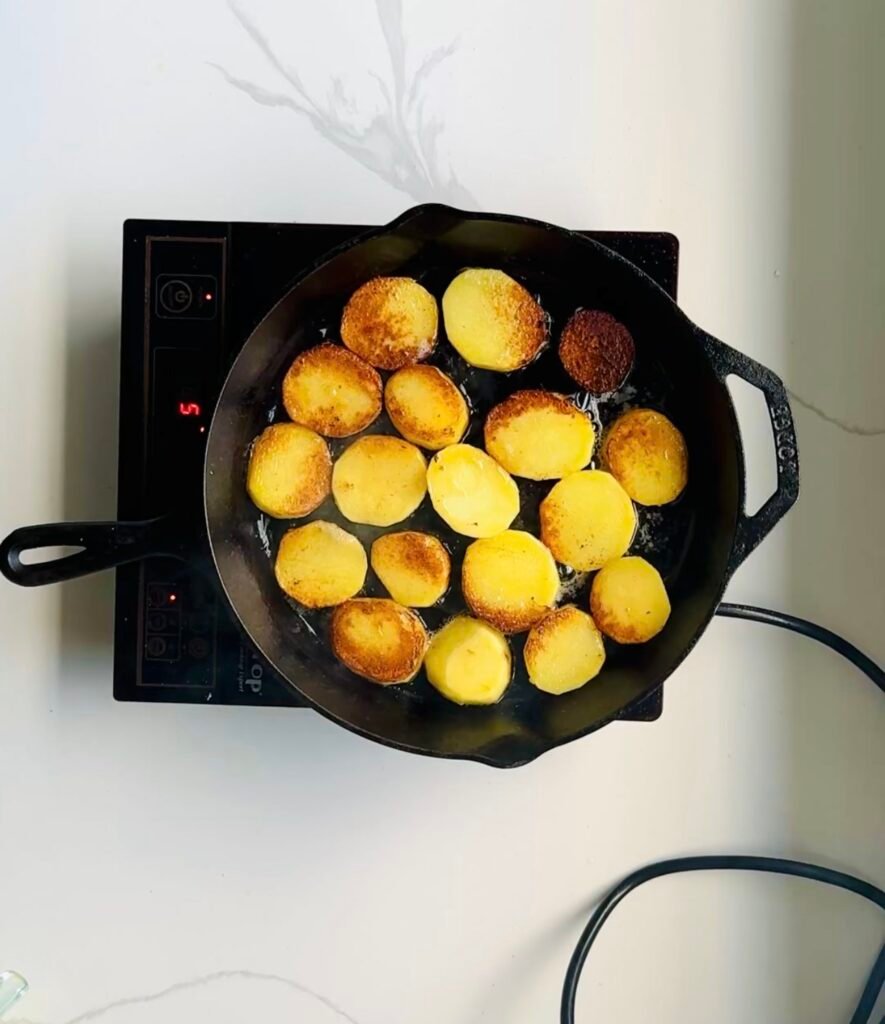
After you peel and slice the potatoes, toss them with olive oil, salt, and pepper. Heat a large oven safe skillet over medium high heat and melt the butter. Once the pan is hot, add the potatoes in a single layer and let them sear undisturbed. This part is important. If you move them too soon, they will not form that deep golden crust.
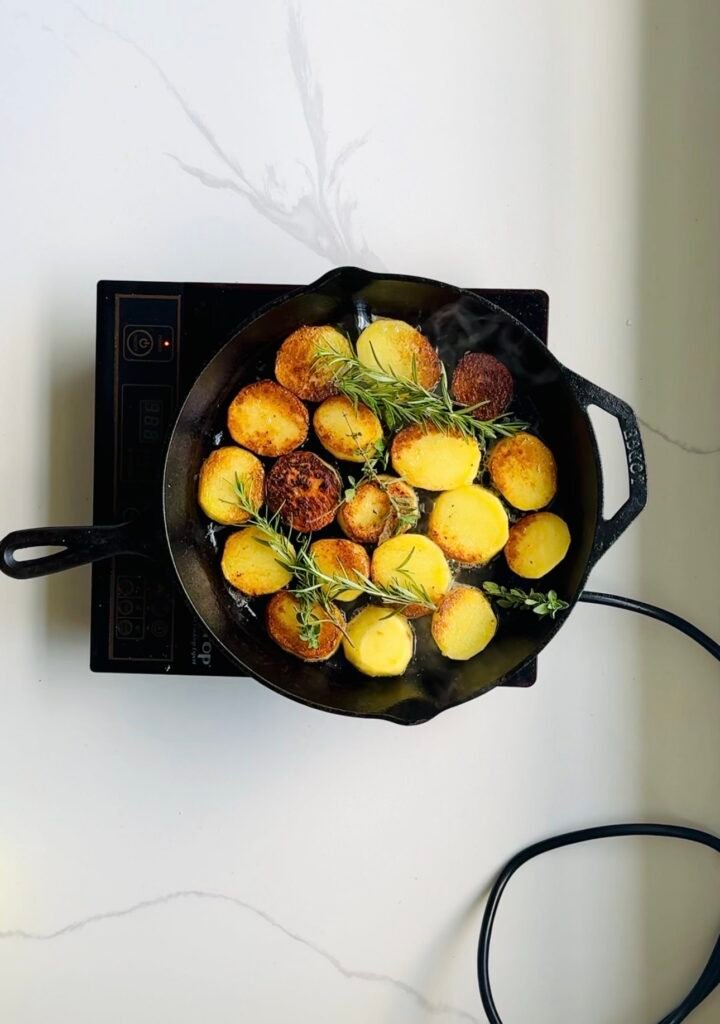
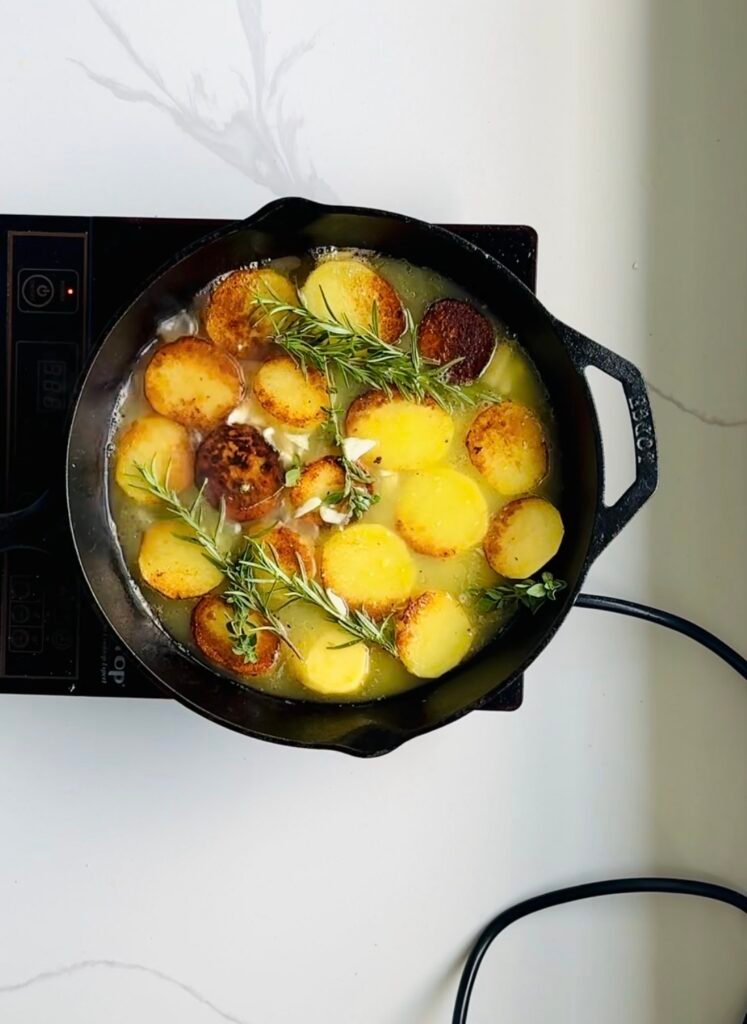
Once both sides are well browned, add the smashed garlic, rosemary, and oregano. Stir gently just until fragrant. Then pour in the broth and transfer the pan to the oven. As the potatoes roast, they absorb the broth and soften in the center while the tops stay beautifully browned.
Halfway through you could spoon some of the hot liquid over the potatoes. By the end, the broth should be reduced and glossy, and the potatoes should be tender all the way through.
A good oven safe skillet like the Lodge Cast Iron Skillet is especially useful here because it holds heat so well and helps the potatoes brown evenly. I have had this skillet for over a decade and it is a must in my opinion.
Tips for success and common mistakes
Let the potatoes brown properly
Do not rush the skillet step. Good color equals good flavor. If the potatoes look pale, give them more time.
Keep the slices even
If some slices are much thicker than others, they will not cook evenly. Aim for a consistent ¾ inch cut.
Do not overcrowd the pan
The potatoes need room to brown. If they are packed too tightly, they will steam instead of crisp.
Use enough seasoning
Potatoes need salt. The broth adds flavor too, but seasoning the slices before browning makes a noticeable difference.
Spoon the broth over the potatoes
This helps the tops stay flavorful and glossy while the centers continue to absorb liquid.
Substitutions and variations
You can easily adjust this recipe depending on what you have.
If you want to keep the recipe vegetarian, use vegetable broth instead of chicken broth.
If you do not have rosemary, thyme works well. If you do not have oregano, a little sage can add a deeper earthy note.
For a brighter finish, add chopped parsley after roasting.
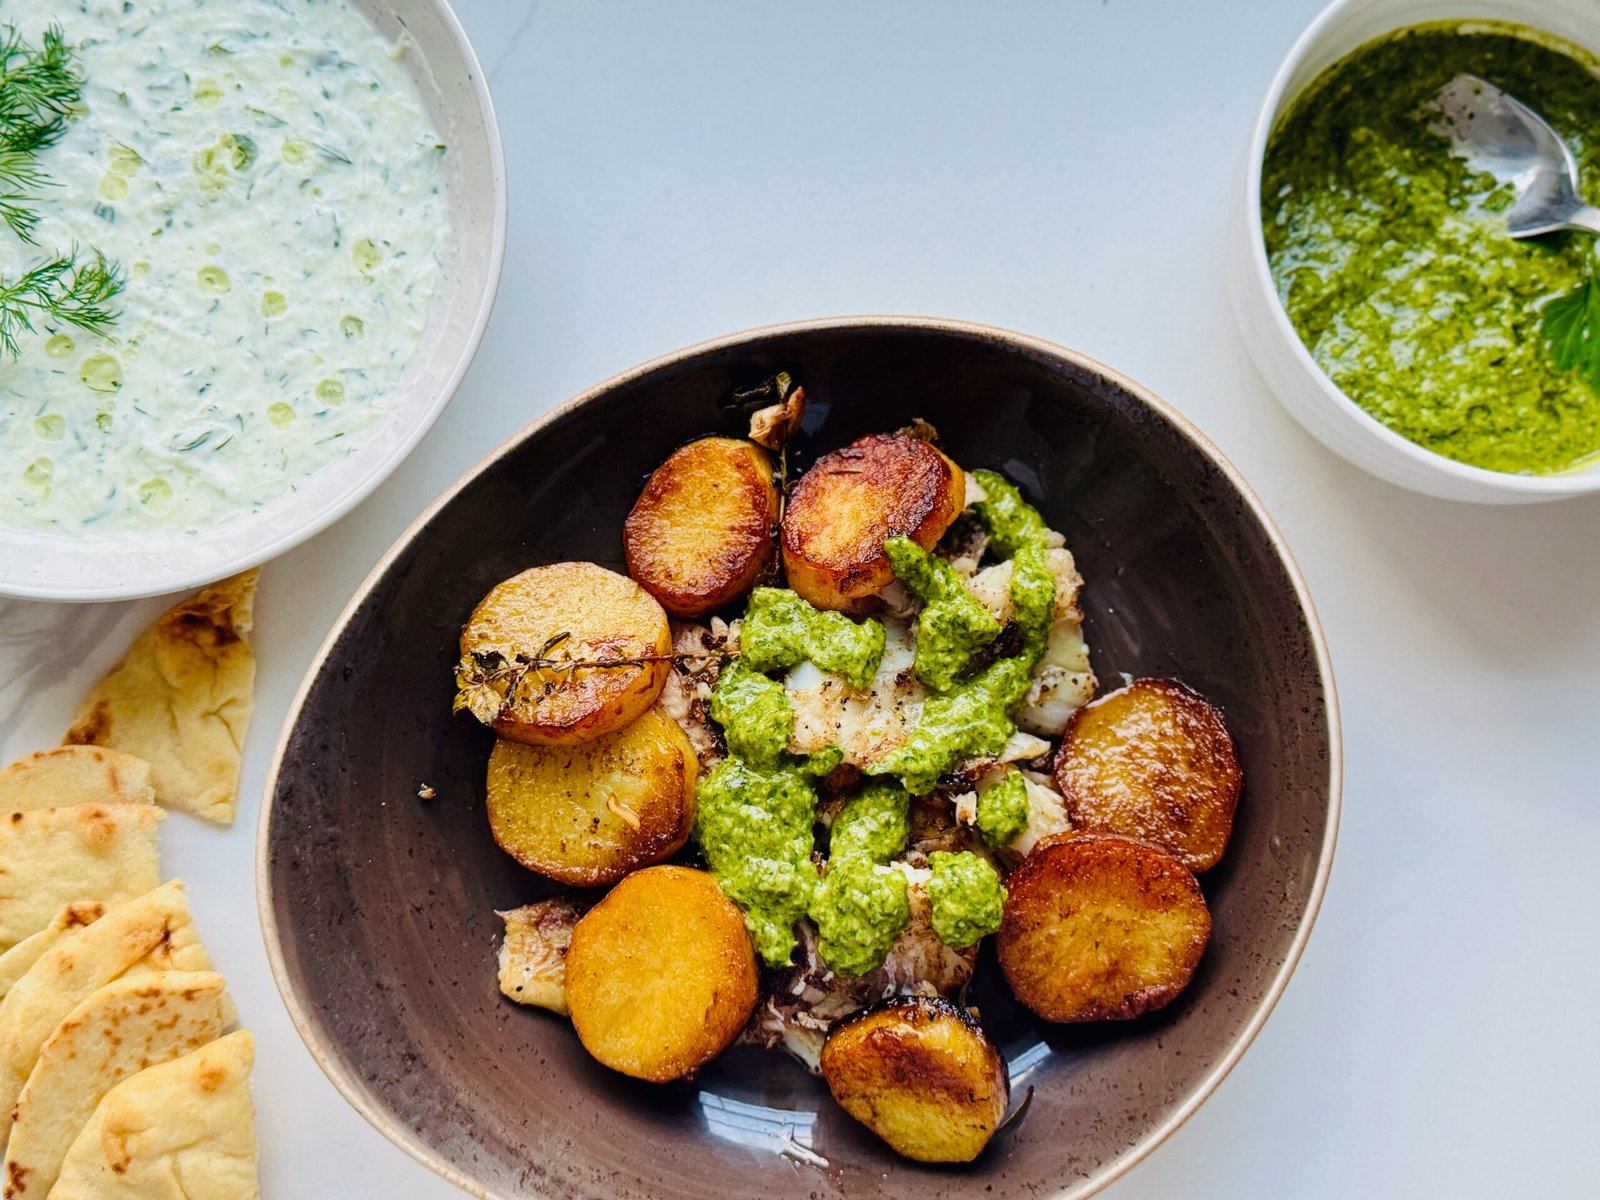
For an even more special presentation, top the finished potatoes with a spoonful of my Zhough sauce or green sauce. That is my favorite way to serve them. The bright herb flavor plays so well with the buttery crust and soft center.
And if you like building meals around sauces, these potatoes are perfect with the ideas in my five sauces every cook should have. Honestly, every sauce in that post could work here, but the green sauce is the one I reach for first.
You could also think about this recipe through the lens of the Pantry First Method. A great sauce plus a well cooked base ingredient is often all you need to make dinner feel special.
Serving suggestions and pairing ideas
These potatoes are incredibly flexible. They can sit next to a simple roast chicken on a Sunday dinner table or appear next to something more dramatic for a holiday meal.
They pair especially well with beef, lamb, and chicken. If you are planning a more elevated meal, serve them with my Beef Wellington recipe and let the potatoes soak up some of those rich flavors on the plate.
For a lighter plate, serve them with a crisp salad and a spoonful of green sauce.
They are also a great side for dinner parties because they feel impressive without being fussy. You can brown them ahead, finish them in the oven just before serving, and then take them straight to the table in the skillet.
Storage reheating and make ahead guidance
Store leftover potatoes in an airtight container in the refrigerator for up to 3 days. A glass storage set like Rubbermaid Brilliance Containers is great for this because it keeps leftovers fresh and makes reheating easy.
To reheat, place the potatoes in a 375°F oven until hot and crisp again around the edges. You can also warm them in a skillet, but the oven does the best job of bringing back that crust.
If you want to get ahead, you can peel and slice the potatoes a few hours before cooking. Keep them in cold water so they do not brown, then dry them very well before seasoning and searing.
You can also brown the potatoes earlier in the day and finish roasting them right before dinner. That makes this a very practical option for guests.
Frequently asked questions
What are melting potatoes
Melting potatoes are thick cut potato rounds that are first browned in fat and then roasted in broth until they become crisp outside and tender inside.
Why cut melting potatoes thinner
Cutting them a little thinner gives you more crust, more browning, and more concentrated flavor in every bite. It is a small change that improves both texture and taste.
What potatoes are best for melting potatoes
Yukon gold potatoes are the best choice because they hold their shape while becoming creamy and tender in the oven.
Can I make melting potatoes ahead
Yes. You can brown them ahead and roast them closer to serving time, or slice the potatoes in advance and keep them in cold water until you are ready to cook.
Can I use vegetable broth instead of chicken broth
Yes. Vegetable broth works very well and keeps the dish vegetarian.
What sauce goes best with these potatoes
They are excellent on their own, but I especially love them with green sauce or Zhough sauce. They also pair well with the sauces from my five sauces every cook should have.
Final thoughts
If you love potatoes with deep crust, tender centers, and real flavor, these thin cut melting potatoes need to be on your list. They feel classic and comforting, but that small thin cut adjustment makes them even better.
This is one of those side dishes that surprises people. It looks simple, but the flavor is rich, savory, and layered in a way that makes everyone go back for another spoonful.
If you make them, try serving them with green sauce or alongside my Beef Wellington recipe for a dinner that feels truly special.
Some of the links in this post are affiliate links, which means I may earn a small commission at no extra cost to you. Thanks for supporting the blog.
Thin Cut Melting Potatoes
Equipment
- Large chef knife
- Large bowl
- Large oven safe skillet
- Tongs or spatula
- Measuring cup
Ingredients
- 2 pounds Yukon gold potatoes peeled and sliced into rounds about ¾ inch thick about 907 g
- 2 tablespoons olive oil about 28 g
- 1 teaspoon kosher salt about 5 g
- ½ teaspoon black pepper about 1 g
- 3 tablespoons unsalted butter about 42 g
- 4 garlic cloves smashed about 16 g
- 1 tablespoon fresh rosemary finely chopped about 3 g
- 1 teaspoon dried oregano about 1 g or 1 tablespoon fresh oregano finely chopped about 3 g
- 1 cup chicken broth or vegetable broth about 240 g
Instructions
- Preheat the oven to 450°F.
- Peel the potatoes and slice them into rounds about ¾ inch thick. This thinner cut helps the potatoes brown more evenly and absorb more flavor.
- Place the potato rounds in a large bowl. Add the olive oil, salt, and black pepper. Toss until evenly coated.
- Heat a large oven safe skillet over medium high heat. Add the butter and let it melt.
- Arrange the potatoes in a single layer. Cook for 4 to 5 minutes on the first side until the bottoms are deeply golden. Flip and cook for 4 to 5 minutes on the second side until golden again.
- Add the smashed garlic, chopped rosemary, and oregano to the skillet. Stir gently for about 30 seconds until fragrant.
- Pour in the broth carefully. Transfer the skillet to the oven and roast for 20 to 25 minutes. Spoon some of the hot broth over the potatoes halfway through cooking.
- The potatoes are done when they are tender all the way through and the broth has reduced into a buttery glaze.
- Let the potatoes rest for 5 minutes, then serve warm with some of the pan juices spooned over the top.
Notes
Try to keep the slices as even as possible so they cook at the same rate.
Do not move the potatoes too early in the skillet or you will lose some of that golden crust. Substitutions Use vegetable broth to keep the recipe vegetarian.
Fresh thyme can be used in place of rosemary or oregano.
Ghee can replace butter for a slightly nuttier flavor. Variations Add a little grated Parmesan at the end for a savory finish.
Finish with chopped parsley or chives for extra freshness.
Serve with a spoonful of green sauce for a bright herbal contrast. Storage and reheating Store leftovers in an airtight container in the refrigerator for up to 3 days.
Reheat in a 375°F oven until hot and crisp around the edges. Make ahead guidance You can peel and slice the potatoes a few hours ahead. Keep them in cold water, then dry them very well before cooking.
You can also brown the potatoes ahead of time and finish roasting them just before serving. Serving ideas Serve with roast chicken, steak, lamb, or a holiday main course.
These pair especially well with Beef Wellington and with any sauce from the five sauces post.


Rufus Dewanou says
The Colorful Pantry